

Your Ultimate DIY Guide: How to Install a Mixer Tap and Waste with Home Depot Essentials
Thinking about giving your kitchen or bathroom a little refresh? Swapping out an old tap and waste can really make a difference, and it's totally something you can do yourself. No need to call in a pro for this one. This guide will walk you through how to install a mixer tap and waste using stuff you can easily grab from Home Depot. We'll cover everything, from picking out the right parts to making sure nothing leaks when you're done. Get ready to tackle this project and feel good about your new setup!
Key Takeaways
- Always shut off your water before starting any plumbing work. This is super important to avoid a big mess.
- Make sure your new tap and waste parts are compatible with your sink and existing pipes. Double-check sizes and types before you buy.
- Take your time with each step, especially when connecting water lines and sealing the drain. Rushing can lead to leaks.
- After installation, turn on the water slowly and check everywhere for drips. It's better to find a small leak now than a big one later.
- Keep your new tap and waste clean and do quick checks every now and then to prevent clogs and keep things working right.
Gathering Your Home Depot Essentials
Before you even think about touching a wrench, you need to make sure you have all the right gear. A trip to Home Depot is in order! This section breaks down exactly what you'll need to grab to make this DIY project a success. Trust me, a little prep goes a long way.
Selecting the Right Mixer Tap
Choosing the perfect mixer tap is more than just picking something shiny. You need to consider your sink's configuration (number of holes), the style you're after, and your budget. Take some measurements of your current setup before heading to the store. This will help you avoid buying a tap that doesn't fit. Also, think about the water pressure in your home. Some taps are better suited for low-pressure systems than others. Don't forget to check the tap's flow rate – you don't want a trickle when you're trying to fill a pot!
Choosing a Compatible Waste Assembly
The waste assembly is what lets the water drain away, so it's pretty important. You'll need to make sure the new waste assembly is compatible with both your sink and your plumbing. Check the diameter of the drain opening in your sink and the size of your drainpipe. There are different types of waste assemblies, including pop-up, flip-top, and standard plug-and-chain. Pick one that suits your needs and preferences. Don't skimp on quality here; a leaky waste assembly can cause some serious problems down the line. Consider a plumbing service if you're unsure about compatibility.
Essential Tools and Supplies
Okay, so you've got your mixer tap and waste assembly. Now, let's talk tools. Here's a list of what you'll likely need:
- Adjustable wrench: For tightening and loosening nuts and bolts.
- Basin wrench: This is super handy for getting to those hard-to-reach nuts under the sink.
- Plumber's tape: For sealing threaded connections.
- Pliers: For gripping and turning.
- Screwdrivers (Phillips and flathead): You'll need these for various screws.
- Bucket: To catch any water when disconnecting the old fixtures.
- Old towels or cloths: For mopping up spills.
- Safety glasses: Protect your eyes from debris.
- Gloves: Keep your hands clean and protected.
Don't forget the small stuff! Things like a utility knife, sandpaper (for cleaning up any rough edges), and a flashlight can be lifesavers. It's always better to be over-prepared than under-prepared. Trust me, you don't want to be running back to Home Depot mid-project.
Preparing Your Sink for Installation
Before you even think about touching that shiny new mixer tap, it's time to get your sink area prepped and ready. This isn't the most glamorous part, but trust me, a little prep work goes a long way in making the whole installation process smoother. Think of it as laying the foundation for a successful project. Rushing this step can lead to headaches later on, so let's take our time and do it right.
Clearing the Workspace
First things first, you need to create some elbow room. Remove everything from under the sink – cleaning supplies, spare sponges, that weird collection of half-used bottles, everything. You want a clear, unobstructed view of the plumbing and plenty of space to maneuver. This also gives you a chance to give the cabinet a quick wipe down – bonus points for tidiness! I usually lay down an old towel or drop cloth to protect the cabinet floor from any drips or spills. Trust me, you'll thank me later.
Shutting Off Water Supply
This is non-negotiable. Find the shut-off valves for both the hot and cold water lines leading to your sink. They're usually located directly under the sink, but sometimes they're in the basement or a nearby utility closet. Turn them clockwise until they're completely closed. To double-check, turn on your old faucet. If water still trickles out, the valves aren't fully closed, and you'll need to investigate further. Maybe the valves are faulty, or you're turning the wrong ones. Better safe than sorry – a flooded bathroom is no fun for anyone. If you can't find or operate the shut-off valves, it's time to call a plumber. Don't risk it!
Removing the Old Fixtures
Now for the fun part – demolition! Grab your wrench and get ready to loosen the connections to the old faucet and waste assembly. Place a bucket underneath to catch any residual water. Disconnect the water supply lines from the old faucet. Then, loosen the nuts holding the old faucet in place from underneath the sink. You might need a basin wrench for this, especially if space is tight. Once the faucet is free, carefully lift it out. Next, tackle the waste assembly. Loosen the nut connecting the drainpipe to the P-trap. Then, unscrew the flange from inside the sink. Again, have that bucket handy! Once everything is disconnected, remove the old waste assembly. Give the sink a good cleaning to remove any old sealant or grime. You want a clean surface for the new fixtures to adhere to. Now you're ready to install the new mixer tap and waste!
Installing the New Mixer Tap
Mounting the Faucet Base
Alright, time to get that shiny new mixer tap in place! First things first, grab the faucet base. Make sure the area around the sink hole is clean and dry. You don't want any old grime messing with the seal. Now, carefully position the base, ensuring it sits flush against the sink surface. Most mixer taps come with a rubber or silicone gasket; place this between the base and the sink to create a watertight seal. From underneath the sink, you'll usually find a mounting nut or bracket. Tighten this securely, but don't go overboard – you don't want to crack the sink! A basin wrench can be super helpful here, especially in tight spaces. Double-check that the faucet base is properly aligned and doesn't wobble before moving on.
Connecting Water Supply Lines
This is where things get a little more involved, but don't sweat it. You'll need to connect the water supply lines to the mixer tap. Typically, these are flexible hoses that come with the tap. Identify the hot and cold water lines – usually marked with red (hot) and blue (cold). Attach the corresponding hoses to the mixer tap's tailpieces. Use adjustable wrenches to tighten the connections, but again, be careful not to overtighten. Next, connect the other ends of the hoses to your home's water supply valves. Before you do this, make sure the valves are still turned off! Once connected, slowly turn the valves back on, just a little bit, and check for any leaks at the connections. If you spot any drips, tighten the connections a bit more. If you're still having trouble, Teflon tape can be your best friend – wrap a few layers around the threads before reconnecting. This can help create a tighter seal. Remember to check the water supply valves for any signs of wear or corrosion before you start.
Securing the Tap Assembly
Okay, almost there! Now that the water lines are connected, it's time to fully secure the tap assembly. Double-check that the faucet is straight and aligned the way you want it. From underneath the sink, tighten any remaining mounting hardware, such as screws or brackets. Make sure everything is snug and secure. Give the faucet a gentle wiggle to ensure it's stable. If it moves at all, tighten the hardware a bit more. Once you're satisfied that the tap is securely mounted, give it one last visual inspection. Check for any kinks in the water supply lines and make sure they're not rubbing against anything sharp. Now you're ready to move on to fitting the waste assembly.
Installing a new mixer tap can seem daunting, but with a little patience and the right tools, it's totally doable. Just take your time, follow the instructions carefully, and don't be afraid to ask for help if you get stuck. And remember, safety first – always turn off the water supply before starting any plumbing work!
Fitting the Waste Assembly
Assembling the Drain Components
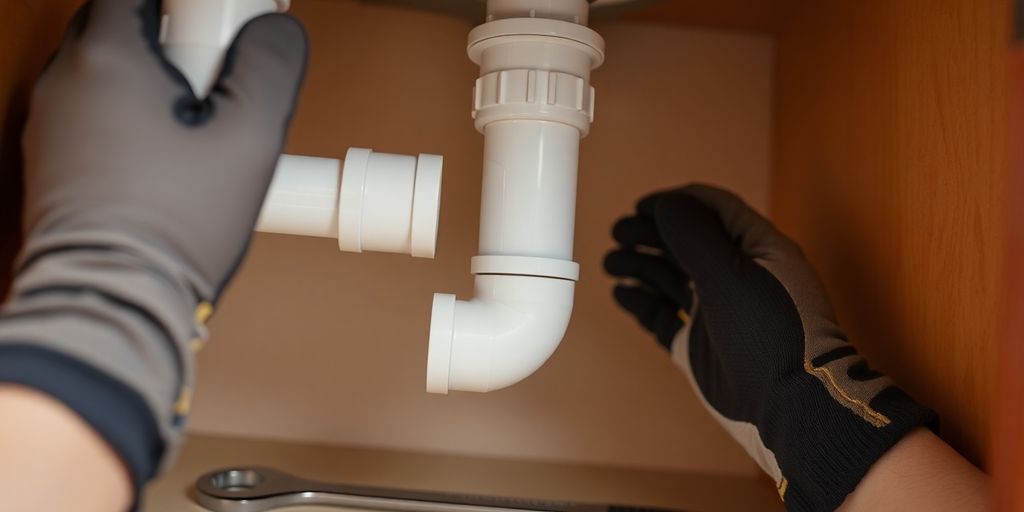
Okay, so you've got all the parts for your new waste assembly. Now it's time to put them together. This usually involves connecting several pieces, like the tailpiece, strainer body, and various washers and nuts. Make sure you have a diagram or the instructions handy, because it can get confusing quickly.
Here's a general idea of what you'll be doing:
- Attach the tailpiece to the strainer body.
- Slide on any necessary washers or gaskets.
- Tighten the nuts by hand, then use a wrench for a snug fit. Don't overtighten, or you risk cracking the plastic parts.
- Double-check that all connections are secure before moving on.
Sealing the Waste Flange
This is where you create a watertight seal between the sink and the waste assembly. You'll typically use plumber's putty for this. Roll the putty into a rope and press it around the underside of the waste flange. Then, insert the flange into the sink drain opening and press down firmly. Excess putty will squeeze out, which you can wipe away. This step is important to prevent leaks, so take your time and make sure you get a good seal. You might want to consider a deluxe strainer basket assembly for a better seal.
Connecting to the P-Trap
The P-trap is the curved pipe that traps debris and prevents sewer gases from entering your home. Connecting the waste assembly to the P-trap is usually the final step. Align the waste assembly with the P-trap and use slip nuts to secure the connection. Again, hand-tighten first, then use a wrench for a snug fit. Make sure the P-trap is properly aligned to ensure proper drainage. If the pipes don't quite line up, you might need to use extension pieces or adjustable fittings. Remember to account for the fitting length when planning your connections.
It's always a good idea to have a bucket and some towels handy during this process. Even if you're careful, there's a good chance you'll spill some water. Also, don't be afraid to take breaks if you get frustrated. It's better to step away for a few minutes than to rush and make mistakes.
Testing and Troubleshooting Your New Installation
Checking for Leaks
Alright, you've got everything installed, but before you start bragging to your friends, let's make sure water stays where it's supposed to. The first step is a thorough leak check. Turn on both the hot and cold water, one at a time, and then together. Get under the sink with a flashlight and carefully inspect all connections: where the supply lines connect to the tap, where the waste assembly connects to the sink, and where the P-trap connects to the drainpipe.
Here's what to look for:
- Dripping water
- Moisture or dampness around connections
- Water stains on the cabinet floor
If you find a leak, don't panic! Usually, it's just a matter of tightening a connection. Use your wrench to gently tighten the fitting, but be careful not to overtighten, as this can damage the threads. Dry the area completely and check again. If the leak persists, you might need to disassemble the connection, check the waste flange for proper seating, and reapply plumber's tape or sealant.
Verifying Water Flow and Pressure
Once you're confident there are no leaks, it's time to check the water flow and pressure. Turn both taps on fully and observe the water stream. It should be a smooth, consistent flow, without sputtering or excessive splashing. If the water pressure seems low, there are a few things you can check:
- Make sure the shut-off valves under the sink are fully open.
- Check the aerator on the tap for debris or mineral buildup. Unscrew the aerator and clean it thoroughly.
- If you have a water pressure regulator in your home, check to see if it needs adjustment.
Sometimes, after working on plumbing, air can get trapped in the lines, causing sputtering. Run the water for a few minutes to allow the air to escape. If the problem persists, consult a plumber.
Addressing Common Issues
Even with careful installation, you might encounter a few common issues. Here's a quick rundown of some potential problems and how to address them:
- Slow draining: This is often caused by a partial clog in the drainpipe. Try using a plunger or a drain snake to clear the blockage. Avoid chemical drain cleaners, as they can damage your pipes.
- Noisy pipes: Banging or rattling pipes can be caused by loose pipe straps or water hammer. Secure any loose pipes with pipe straps. If you suspect water hammer, you may need to install water hammer arrestors.
- Leaky faucet: If the faucet drips even when turned off, it could be a worn-out washer or O-ring. Replacing these parts is a relatively simple repair, and you can find replacement parts at Home Depot essentials.
If you're uncomfortable tackling any of these issues yourself, don't hesitate to call a qualified plumber. It's always better to be safe than sorry when it comes to plumbing!
Maintaining Your New Mixer Tap and Waste
Regular Cleaning Practices
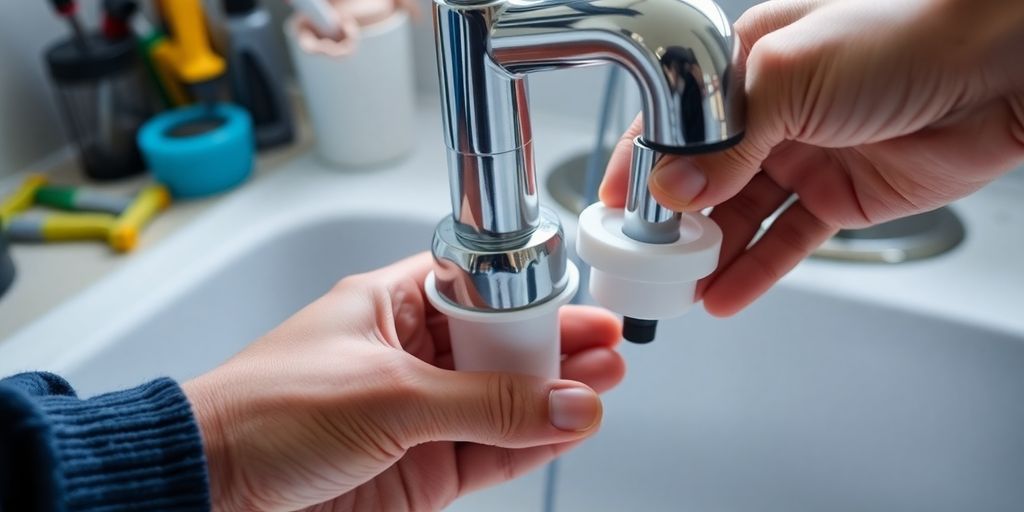
Keeping your new mixer tap and waste clean is super important for both looks and function. Regular cleaning prevents buildup and keeps everything flowing smoothly. Here's what I do:
- Wipe down the faucet and sink daily with a soft cloth and mild soap. This prevents water spots and grime from setting in.
- Use a toothbrush to scrub around the base of the faucet and the drain to remove any stubborn dirt.
- For stainless steel, a stainless steel cleaner works wonders to keep it shiny. Just be sure to rinse thoroughly.
Preventing Clogs and Blockages
Clogs are a pain, but with a few simple habits, you can avoid most of them. I've learned the hard way that prevention is key!
- Always use a sink strainer to catch food scraps and hair. It's a cheap and easy way to save yourself a lot of trouble.
- Avoid pouring fats, oils, and grease down the drain. They solidify and cause major blockages. Instead, wipe them up and toss them in the trash.
- Flush the drain with hot water after each use to help clear away any lingering debris.
I once poured bacon grease down the drain, thinking it wouldn't be a big deal. A week later, I had a major clog that required a plumber. Lesson learned: never underestimate the power of grease to wreak havoc on your plumbing!
Seasonal Checks and Proactive Upkeep
Just like your car, your mixer tap and waste benefit from seasonal check-ups. Temperature changes can affect plumbing, so it's good to be proactive. Here's my routine:
- In the fall, I check all the connections for tightness. Cold weather can cause pipes to contract, leading to leaks.
- In the spring, I inspect for any signs of corrosion or damage. Humidity can accelerate corrosion, especially on metal parts.
- I also make sure the shut-off valves under the sink are working properly. It's good to know you can quickly turn off the water in case of an emergency.
| Season | Check Item | Action |
|---|---|---|
| Fall | Connections | Tighten any loose nuts |
| Spring | Corrosion/Damage | Inspect and clean |
| Both | Shut-off Valves | Verify smooth operation |
Wrapping It Up: Your New Mixer Tap and Waste
So, there you have it! Installing a new mixer tap and waste might seem like a big job, but with the right stuff from Home Depot and a little patience, you totally got this. It's pretty cool, right? You just saved some cash and learned a new skill. Plus, now you've got a shiny new tap that works great. Remember, if things get tricky, it's okay to take a break and come back to it. And hey, if you run into a real snag, there's no shame in calling in a pro. But for most folks, this DIY project is totally doable. Enjoy your upgraded sink!
Frequently Asked Questions
My new faucet is dripping a little. Is that a big deal?
A small drip might seem okay, but it can waste a lot of water over time and make your water bill go up. It's usually caused by old washers or seals inside the faucet. You can try to fix it yourself if you're handy, but if you're not sure, it's best to call a professional so you don't make it worse.
What should I do if my sink is draining very slowly?
If water is draining slowly or just sitting in your sink, it means something is stuck in the pipes. This could be food, grease, or hair. You can try a plunger or a store-bought drain cleaner, but sometimes these can harm your pipes. A plumber can use special tools to clear the clog safely and completely.
I noticed a crack in my sink basin. Can I fix it myself?
If your sink basin has a crack, even a small one, it can get bigger and lead to water leaks. If the crack is tiny, you might be able to fix it with a special sealant. But for bigger cracks or if you're worried about it, it's usually better to have a professional look at it. They can tell you if it needs to be repaired or if you need a new sink.
Why is the water pressure low from my new mixer tap?
If the water pressure from your new tap isn't strong, it could be a few things. Sometimes there's a tiny screen called an aerator at the end of the faucet that can get clogged. You can usually unscrew it and clean it. If that doesn't help, there might be a bigger issue with your home's water pressure or how the tap was installed. You might need a plumber to check it out.
How can I keep my new mixer tap and waste clean and working well?
You can keep your new tap and waste in good shape by cleaning them regularly with gentle soap and water. Try not to use harsh chemicals, as they can damage the finish. For the drain, try to avoid putting grease, coffee grounds, or large food scraps down it. Using a drain cover can also help catch debris before it goes down the pipe.
When should I call a professional plumber instead of trying to fix something myself?
While some small fixes are okay for DIY, plumbing can be tricky. If you try to fix something and don't do it right, you could cause more damage, like leaks or even make your home's warranty not count anymore. For anything more than a simple fix, or if you're not confident, it's always smarter to call a professional plumber. They have the right tools and know-how to do the job correctly and safely.

