

Upgrade Your Bathroom with a Sleek Concealed Valve Shower Set
Thinking about giving your bathroom a facelift? A concealed valve shower set might be just the ticket. These systems hide all the messy bits behind the wall, leaving you with a super clean, modern look. It’s not as scary as it sounds, and we’re going to walk you through what you need to know to get one installed. Get ready for a bathroom that feels brand new.
Key Takeaways
- A concealed valve shower set hides the main plumbing, showing only the showerhead and controls for a clean look.
- Before installing, gather your tools, plan the layout, and check existing plumbing.
- Installation involves turning off water, fitting the valve, connecting pipes, and mounting fixtures.
- Proper waterproofing around the valve and walls is super important to stop leaks.
- Regular cleaning and checking for issues will keep your concealed valve shower set working well for a long time.
Understanding The Concealed Valve Shower Set
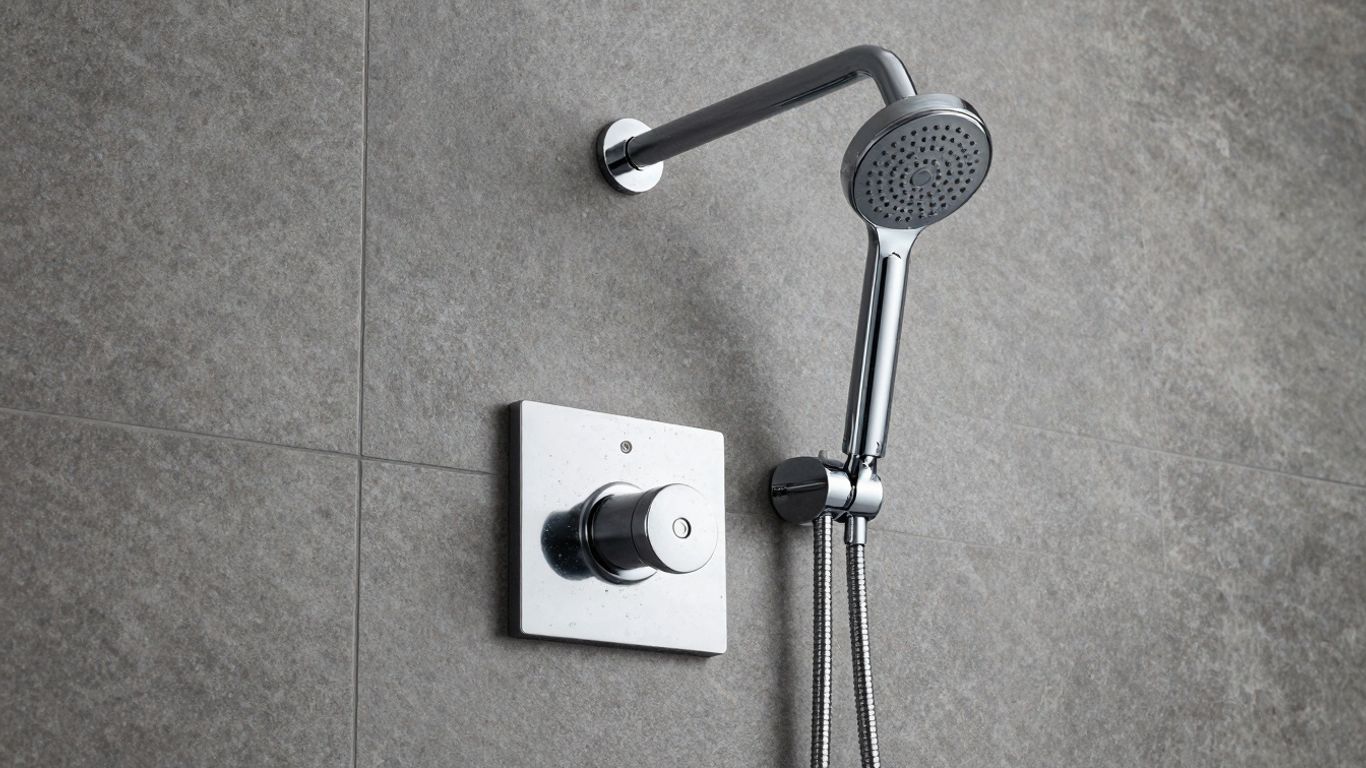
So, you're thinking about upgrading your bathroom, and a concealed valve shower set has caught your eye. That's a smart move if you're after that super clean, modern look. Unlike the old-school showers where all the pipes and the valve box stick out, these systems hide all that behind the wall. This leaves just the sleek showerhead and a minimalist control panel visible. It really makes a difference in how spacious and tidy your bathroom feels.
What Is a Concealed Shower Set?
Basically, a concealed shower set is a shower system where the main plumbing bits – the valve that controls the water temperature and flow, and the pipes feeding it – are tucked away inside the wall. You only see the parts you interact with: the showerhead and the controls. This design is a big part of why bathrooms with these setups look so polished and uncluttered. It's a bit like having a hidden superpower for your shower.
Key Components of a Concealed Shower System
While most of it is hidden, there are a few main parts you'll interact with or that make the system work:
- The Concealed Valve Body: This is the heart of the system, installed behind the wall. It mixes hot and cold water and controls the flow. You can't see it day-to-day, but it's doing all the important work.
- The Trim Kit: This is what you do see. It includes the showerhead, the handle or buttons for controlling temperature and flow, and the escutcheon plate (the decorative plate that covers the hole in the wall). These are the stylish bits that match your bathroom's decor.
- Plumbing Connections: These are the pipes that connect your home's water supply to the valve body and then run to the showerhead.
Benefits of a Concealed Valve Shower Set
Why go through the trouble of hiding everything? Well, there are some pretty good reasons:
- Aesthetics: This is the big one. It gives your bathroom a clean, streamlined, and high-end look. No more visual clutter from exposed pipes or bulky valve boxes.
- Space Saving: By hiding the valve, you free up a little more space in the shower area itself. It might not seem like much, but it contributes to a less cramped feel.
- Easier Cleaning: With fewer nooks and crannies for grime to build up around the shower controls and head, cleaning becomes much simpler. You're mostly just wiping down smooth surfaces.
- Modern Functionality: Many concealed systems come with advanced features like thermostatic controls, which keep the water temperature steady. This means no more sudden blasts of cold water when someone flushes a toilet elsewhere in the house. You can find some really neat thermostatic shower valves that offer precise temperature control.
Installing a concealed shower system often involves more upfront work than a standard exposed shower. You'll need to consider the wall structure and ensure proper waterproofing behind the tiles. However, the long-term visual payoff and improved user experience are usually well worth the effort for many homeowners looking to modernize their bathrooms.
Preparing For Your Concealed Shower Installation
Before you even think about turning on the water or cutting into walls, getting ready for your new concealed shower set is a big deal. It’s not just about grabbing a few tools; it’s about making sure everything is planned out so you don’t end up with a bigger mess than you started with. Proper preparation is key to a smooth installation and a leak-free shower.
Essential Tools and Materials
Gathering the right stuff beforehand saves a ton of headaches later. You'll need:
- Concealed Shower Valve Body: This is the main part that goes behind the wall.
- Shower Head and Trim Kit: This includes the visible parts like the showerhead, handle, and escutcheon plate.
- Plumbing Supplies: Depending on your existing setup, you might need specific pipes (like PEX, copper, or CPVC), connectors, and adapters.
- Basic Plumbing Tools: Think adjustable wrenches, pliers, pipe cutters, and a screwdriver set.
- Drill and Drill Bits: For making holes and mounting the valve and trim.
- Level: To make sure everything is straight.
- Measuring Tape: For accurate placement.
- Waterproof Sealant: Silicone caulk is a must for sealing around the trim plate.
- Teflon Tape (Pipe Thread Sealant): For making watertight connections on threaded pipes.
- Safety Gear: Gloves and eye protection are always a good idea.
Planning the Installation Layout
This is where you figure out exactly where everything is going to live behind your wall. You need to consider:
- Valve Placement: Where will the main valve body sit? It needs to be accessible for future maintenance if possible, but mostly hidden.
- Shower Head Location: Think about the height and angle. Do you want it centered, or off to one side? How high off the ground should it be?
- Control Handle Position: This needs to be within easy reach from inside the shower. Make sure it lines up nicely with the showerhead.
- Existing Plumbing: You'll need to see how your current water lines run and how you'll connect them to the new valve. This might involve rerouting pipes.
You're essentially creating a hidden system, so visualizing the space behind the drywall is important. Think about stud locations, existing pipes, and electrical wiring to avoid any nasty surprises when you start cutting.
Pre-Installation Checks
Before you make any cuts or connections, do a quick check:
- Water Shut-Off: Double-check that the main water supply to your bathroom (or the whole house) is completely turned off. Open a faucet elsewhere to confirm.
- Valve Compatibility: Make sure the new valve body is compatible with your existing water pressure and pipe types.
- Rough-In Dimensions: Check the manufacturer's instructions for the specific rough-in dimensions for your valve. This tells you exactly how deep it needs to sit in the wall and where the mounting points should be.
Step-By-Step Installation Of Your Concealed Valve Shower Set
Alright, let's get this shower installed! It might seem a bit daunting, but if you take it one step at a time, you'll be enjoying that sleek new shower in no time. Remember, if you're not comfortable with plumbing, it's always a good idea to call in a pro.
Turning Off Water Supply
This is the absolute first thing you need to do. Seriously, don't skip this. Find the main water shut-off valve for your house or, if you're lucky, there might be a dedicated shut-off for your bathroom. Turn it off completely. Then, open a faucet somewhere else in the house to drain any remaining water in the pipes. This prevents any messy surprises while you're working.
Installing The Concealed Shower Valve
This is the heart of your new shower system. You'll need to figure out exactly where the valve body will sit behind the wall. This usually involves cutting an opening in your drywall. Make sure the opening is large enough to work in but not so big that it compromises the wall structure. Once you've got the space, position the valve body. It needs to be level and securely mounted. You'll connect your hot and cold water supply lines to the appropriate ports on the valve. Using pipe dope or Teflon tape on threaded connections is a good habit to get into for preventing leaks.
Connecting Plumbing and Mounting Fixtures
Now for the visible parts. You'll connect the shower arm for your showerhead to the valve's outlet. Then, you'll mount the trim plate and the control handle or buttons. These usually attach to the valve body with screws. Make sure everything is aligned properly before you tighten things down. For the showerhead itself, screw it onto the shower arm. Don't forget to connect the diverter if your system has one, allowing you to switch between different shower functions.
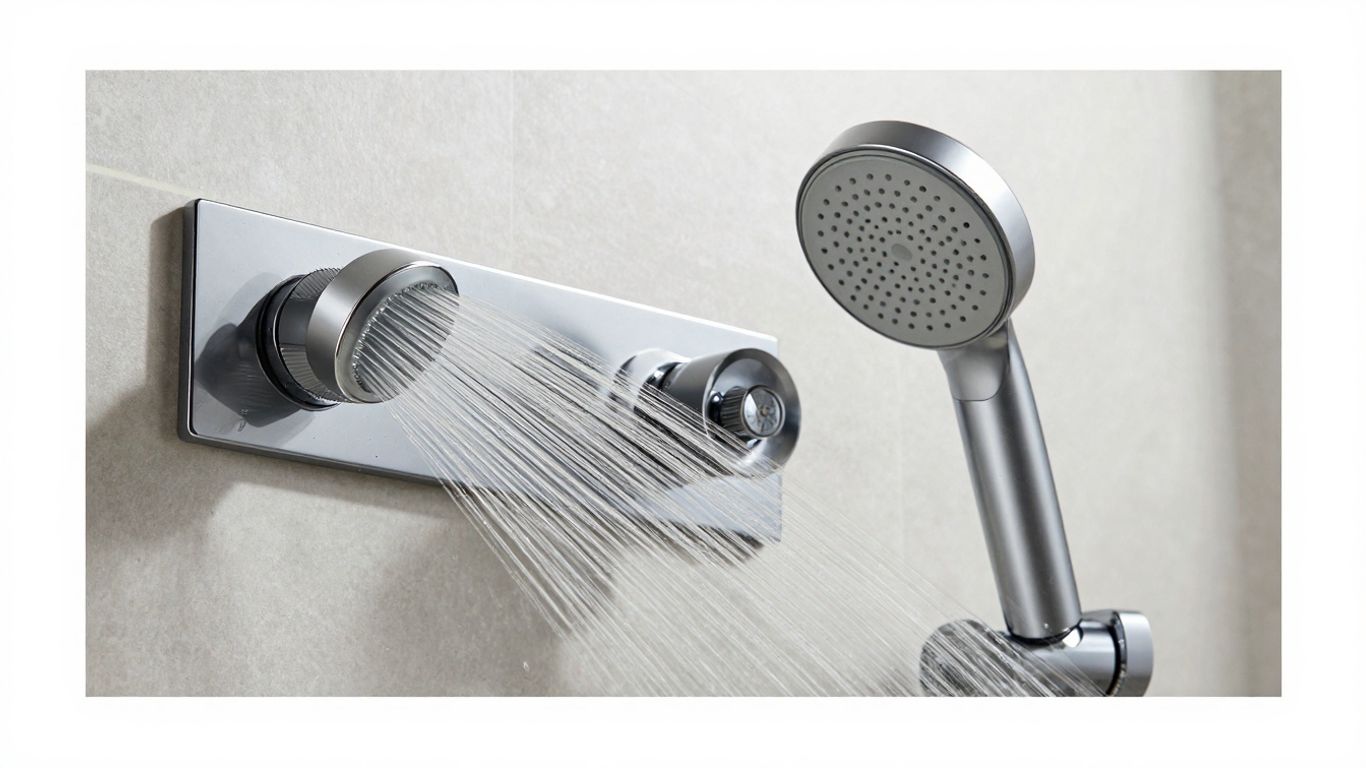
Testing For Leaks and Functionality
Before you put the wall back up or finish tiling, it's time for the moment of truth. Slowly turn the main water supply back on. Check all the connections you made at the valve and any other pipe joints for drips or leaks. Once you're confident there are no leaks, test the shower. Turn the handle to check hot and cold water flow. Make sure the temperature control works smoothly and that the diverter switches between functions correctly. If everything looks good, you're ready for the next steps like waterproofing and finishing the wall.
Ensuring Longevity With Proper Waterproofing
So, you've got your sleek new concealed shower valve all installed. That's great! But before you start picturing yourself relaxing under that perfect stream of water, we need to talk about something really important: waterproofing. This step is what keeps your bathroom looking good and stops water from causing sneaky damage behind your walls. It’s not the most glamorous part, but trust me, it’s the part that saves you headaches later.
Critical Waterproofing Steps
Getting the waterproofing right from the start is key. It’s all about creating a solid barrier that stops moisture from getting anywhere it shouldn't. Think of it as giving your shower walls a good raincoat.
- Apply a waterproof membrane: After the valve is in and the plumbing is connected, but before you put up the final wall surface (like tile backer board), apply a liquid or sheet membrane over the entire shower area. This is your primary defense against water.
- Pay attention to seams and corners: These are the usual suspects for leaks. Make sure you overlap any seams properly and use reinforcing tape in corners for extra protection.
- Extend the waterproofing: Don't just stop at the shower enclosure. Extend the waterproofed area a bit beyond the usual wet zone, especially around the valve and any other penetrations.
Sealing Around Valve and Controls
This is where the magic happens – or where problems can start if you're not careful. The valve and the control panel are direct pathways for water into your wall cavity. A good seal here is non-negotiable.
- Use the right sealant: A high-quality silicone sealant designed for bathrooms is your best friend. Make sure it's mold and mildew resistant.
- Apply a generous bead: Go around the edges of the valve body and the control trim plate where they meet the wall. Don't be shy with the sealant, but also try to keep it neat.
- Smooth it out: Use a wet finger or a caulking tool to create a smooth, continuous seal. This helps push the sealant into any tiny gaps.
Protecting Walls Behind the Fixtures
Even with a good valve and controls, the walls themselves need protection. If you're tiling, the tile and grout aren't completely waterproof on their own. They need a solid backing.
The goal is to create a continuous waterproof barrier from the shower valve, through the walls, and down to the drain. Any break in this barrier, no matter how small, can lead to water intrusion and potential structural damage over time. It’s better to spend a little extra time and material on waterproofing now than to face costly repairs down the road.
- Use water-resistant backer board: If you're installing tile, use cement board or a similar water-resistant backer board instead of standard drywall in the shower area.
- Seal all penetrations: Any pipes or wires that go through the wall need to be sealed where they enter.
- Consider a shower niche: If you're building a shower niche, make sure its interior is also properly waterproofed and sealed, just like the main shower walls.
Troubleshooting Common Concealed Shower Issues
Even with the best planning, sometimes things don't go exactly as planned when you're installing or using a concealed shower set. Don't sweat it, though. Most common problems have pretty straightforward fixes. Let's look at a few you might run into.
Addressing Valve Leakage
This is probably the most common headache. If you notice water seeping out around the valve or control plate, it usually means a seal isn't quite right. First, turn off the water supply immediately to prevent any further issues. Then, you'll want to check all the connections going into the valve body. Sometimes, just tightening a fitting a bit more does the trick. If that doesn't work, you might need to take the valve out, reapply Teflon tape to the threaded connections, and maybe even add a bit of plumber's putty or silicone sealant around the valve body where it meets the wall plate. It's all about making sure that water has absolutely nowhere to go but out of the showerhead.
Resolving Low Water Pressure
Is your shower feeling more like a drizzle? Low water pressure can be frustrating. There are a few culprits here. It could be something as simple as a partially closed shut-off valve somewhere in your system, or maybe the flow restrictor in the showerhead itself is a bit too aggressive for your liking. You can often remove or modify these restrictors (check the manufacturer's instructions first!). Another possibility is a kink or blockage in the water supply lines leading to the valve. If you recently had other plumbing work done, debris might have gotten into the pipes. You might need to disconnect the lines and flush them out. Also, check the valve itself; sometimes, the internal cartridge can get clogged with sediment over time.
Fixing Control Panel Malfunctions
If your temperature control is acting up, or the diverter isn't switching between functions properly, it's usually related to the valve's internal cartridge or the linkages connecting the control handle to the valve. Sometimes, sediment can get lodged in the cartridge, preventing smooth operation. You might be able to clean it by removing the cartridge (again, water off first!). If the control panel itself seems loose or unresponsive, check that it's securely mounted and that all the connecting rods or cables from the handle to the valve are properly seated and not binding. It's a bit like fixing a complex toy; you need to make sure all the little parts are moving freely.
When troubleshooting, always remember to turn off the main water supply to the bathroom before you start taking things apart. It might seem obvious, but it's the most important step to avoid a watery mess and potential damage to your bathroom.
Maintaining Your Sleek Concealed Shower Set
So, you've got this fancy concealed shower set, and it looks amazing. But like anything, it needs a little TLC to keep it working right and looking sharp. It’s not super complicated, honestly. Just a few simple things to keep in mind.
Routine Cleaning and Care
This is probably the easiest part. You want to keep that showerhead and the control panel looking good, right? Just grab a soft cloth – nothing too rough – and give them a wipe down regularly. Think of it like dusting your favorite furniture. Avoid using any harsh cleaners or abrasive pads, because those can really mess up the finish over time. Stick to mild soap and water, or a cleaner specifically made for bathroom fixtures. It makes a big difference in the long run.
Periodic Inspection for Leaks
This is where you want to be a little more hands-on. Every few months, it's a good idea to just take a quick look around the valve and where the showerhead connects. Are there any drips? Any little puddles forming where they shouldn't be? Even a tiny leak can turn into a bigger problem if you ignore it. Check the seals and any visible connections. If you spot something, it’s better to address it sooner rather than later. It might just be a loose fitting, or maybe the sealant needs a refresh.
Replacing Worn Components
Sometimes, parts just wear out. It happens. Maybe the handle on your control panel feels a bit loose, or the showerhead isn't spraying quite right anymore. Don't just live with it! If you notice a part isn't working as it should, or if it looks damaged, it’s time to think about replacing it. Most manufacturers have replacement parts available. It’s usually a pretty straightforward swap, and it keeps your whole shower system running smoothly and looking its best. It’s way better than waiting for a small issue to become a major headache.
Final Thoughts
So, you've made it through the guide on installing a concealed shower set. It might seem like a lot, but taking it step-by-step makes it totally doable. The end result is a bathroom that looks super clean and modern, which is pretty awesome. Just remember to double-check all those connections and make sure everything's waterproofed right. A little bit of care during the install goes a long way for a shower that works great for years to come. Enjoy your upgraded shower space!
Frequently Asked Questions
Can I put in a hidden shower system myself?
If you're comfortable with home projects and have some basic plumbing know-how, you might be able to install it yourself. However, for a really clean and professional job, especially if your current pipes need changing, it's often best to get a plumber to help. They know all the tricks to make sure it's done right and won't leak.
Do I need to change my existing pipes for a hidden shower?
Most likely, yes. Hidden shower systems need pipes and the main valve tucked away behind the wall. This usually means making some changes to how your current pipes are set up. It's like giving your plumbing a makeover to fit the new, clean look.
How long does it usually take to install one of these?
It really depends on how complicated the job is and how much experience you have. It could take a few hours if things go smoothly, or it might take most of a day if you need to do more work on the existing pipes or walls. Planning ahead really helps speed things up.
What's the main difference between a hidden shower and a regular one?
The big difference is that with a hidden shower, almost all the pipes and the main control box are tucked away behind your bathroom wall. You only see the showerhead and the handles or buttons you use to control the water. It makes your shower area look super neat and modern, with nothing extra sticking out.
What problems might I run into, and how do I fix them?
Sometimes, you might notice small leaks around where the valve or controls are. The fix is usually to make sure everything is sealed up tight with waterproof stuff like silicone and to use special tape on pipe threads. If the water pressure seems low, check that the water supply is fully on and that no pipes are bent or blocked. If the controls act up, double-check how they're connected to the valve.
How do I keep my new hidden shower looking good?
Taking care of it is pretty simple! Just wipe down the visible parts, like the showerhead and controls, with a soft cloth after you use them. Avoid using really strong cleaning sprays, as they can damage the finish over time. Also, it's a good idea to occasionally check for any drips or leaks, just to be safe.

