

Mastering Bathroom Fixture Installation: Your Pro Guide
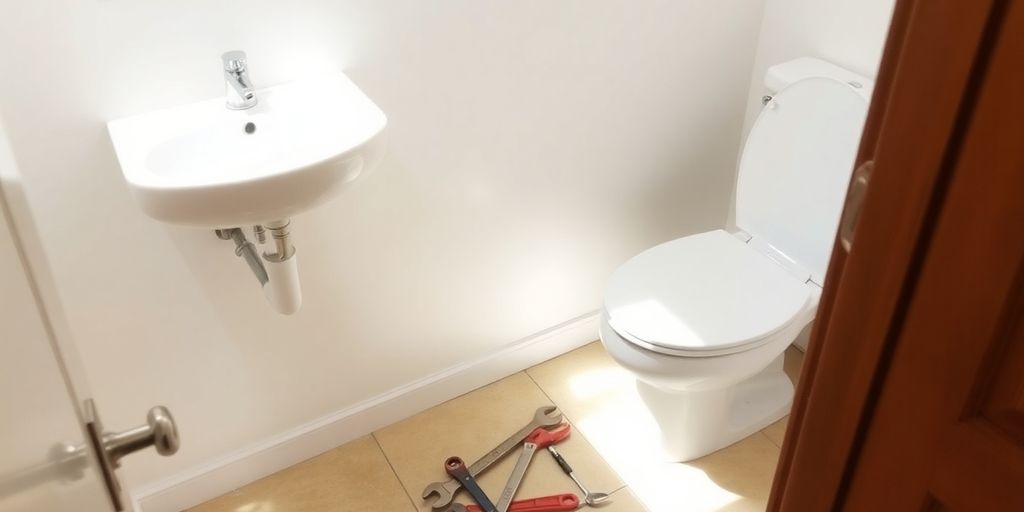
Thinking about tackling that bathroom fixture installation yourself? It might seem like a big job, but with the right approach, you can get professional results. We're talking about making your bathroom look great without needing to call in the pros for every little thing. This guide will walk you through the process, from getting your tools ready to putting in that new faucet or toilet, so you can feel confident in your DIY skills.
Key Takeaways
- Gather all necessary tools and materials before you start to make the installation process smoother.
- Proper site preparation, including understanding your plumbing and removing old fixtures carefully, is vital for a good outcome.
- Follow manufacturer instructions closely for each fixture to ensure correct installation and function.
- Testing for leaks and proper operation after installation is a critical step to catch any issues early.
- Know when to call a professional plumber for complex tasks or if you encounter problems you can't solve.
Essential Tools and Materials for Efficient Installation
Getting ready for a bathroom fixture installation means having the right gear. It’s like cooking; you wouldn't try to make a fancy meal without the proper utensils, right? Having the correct tools and materials on hand makes the whole process go a lot smoother, and honestly, it saves you from a lot of headaches later on. Investing in quality tools upfront really does pay off.
Core Tool Requirements
When you're starting out, you'll want a solid basic toolkit. This usually includes things like a level – a torpedo level is handy for tight spots – a set of adjustable wrenches, and some good old channel lock pliers. Don't forget a sturdy hacksaw for any cutting you might need to do. For cleaning up old sealant or wax rings, a putty knife and a scraper are your best friends. And if you're dealing with bolts or need to make adjustments, a cordless drill with a variety of bits will save you a ton of time. A tape measure and a pencil are obvious, but sometimes a small mirror can be a lifesaver for seeing those awkward spots under the fixture. And if you're worried about spills, a shop vacuum that's specifically for water cleanup is a smart thing to have.
Specialized Equipment for Professional Results
If you want your work to look truly professional, there are a few extra items that make a big difference. Sometimes you run into a flange that’s seen better days, maybe it’s corroded or damaged. A closet flange repair kit can fix that right up without needing to do major floor work. If the flange height isn't quite right, flange spacers or extension rings can help you get it level without a lot of fuss. It’s also worth looking into a toilet installation kit; these often come with things like extra-thick wax rings, shims, and different gasket sizes, which are super useful. A good basin wrench can really help when you're trying to connect water supply lines in those cramped spaces. For more involved jobs, having pipe threading equipment and various adapter fittings ready can prevent delays.
Material Selection and Quality Considerations
The stuff you use matters just as much as the tools. For seals, always have a few different types of wax rings on hand, including the extra-thick ones for when the floor isn't perfectly level. Some people even prefer rubber seals for certain situations. When it comes to bolts, stainless steel is the way to go – it costs a little more, but it stops rust and corrosion down the line. For water supply lines, braided stainless steel hoses are much more durable than the basic rubber ones. Having a few different lengths available means you won't have to deal with lines that are too long and might kink. And don't skimp on the shut-off valves; even if the old one seems okay, replacing it with a quality new one can prevent future service calls. It’s all about using materials that last and make your job easier, like getting the right vanity installation tools.
Preparing your workspace and having all your supplies organized before you begin is a key step that many overlook. This simple act of preparation can prevent interruptions and ensure a more efficient workflow throughout the installation process.
Site Preparation and Assessment
Before you even think about putting in a new toilet or faucet, you've got to get the site ready. This isn't just about making things look nice; it's about making sure the installation goes smoothly and lasts. Skipping this part is like building a house on sand – it's just asking for trouble down the road.
Understanding Your Home's Plumbing System
First things first, you need to know what you're dealing with. Take a good look at the existing plumbing. Are the pipes copper, PEX, or something older? Knowing this helps you pick the right connectors and avoid compatibility issues. It’s also important to locate the main water shut-off valve for the house and test it to make sure it works. If it’s seized up, you’ll need to replace it before you start any work, or you could end up with a flooded bathroom. You should also check the water pressure; too high and it can damage new fixtures over time. You might need to install a pressure-reducing valve if that's the case. Understanding the drainage system is just as key, especially making sure the vent stack is clear and functioning correctly. This is all part of getting a good handle on your bathroom renovation checklist.
Removing Old Fixtures
Taking out the old stuff can be trickier than it looks. You'll want to shut off the water supply to the fixture, of course, and then drain any remaining water from the tank or pipes. For toilets, disconnect the water supply line and unbolt the fixture from the floor. Be prepared for some residual water and, yes, that old wax ring. It’s not pretty, but it’s part of the job. Carefully lift the old toilet away, trying not to damage the flooring or the flange underneath. For sinks and faucets, it’s similar – shut off water, disconnect supply lines, and unmount the fixture. Sometimes, old connections are really stuck, so having a pipe wrench or a penetrating oil on hand can be a lifesaver.
Ensuring a Clean and Dry Flange
This is probably the most critical step for a leak-free toilet installation. Once the old toilet is out, you’ll see the flange, which is the fitting that connects the toilet to the drainpipe. You need to get every last bit of the old wax ring off this flange. Use a putty knife or a scraper, but be gentle so you don’t scratch or damage the flange itself. If the flange is cracked, corroded, or sitting too low below the floor level, you absolutely must repair or replace it. Using extra-thick wax rings or flange extenders can help, but a damaged flange is a ticking time bomb for leaks. A clean, solid flange is your best friend here. It’s worth taking the extra time to get this right.
Step-by-Step Professional Installation Guide
Alright, let's get down to business with actually putting that new toilet in. It might seem like a lot, but if you take it step-by-step, it’s totally doable. Professionals have a system, and it’s all about making sure it’s solid and won’t cause headaches later.
Positioning the Toilet and Securing Bolts
First things first, you need to get that new toilet bowl into place. Make sure the closet flange is clean and ready. You’ll want to put a new wax ring onto the flange – some folks like the extra-thick ones, especially if the flange isn't perfectly level. Carefully lower the toilet bowl straight down onto the wax ring, lining up the bolt holes. Once it’s sitting right, put the washers and nuts onto the closet bolts. Don't crank them down all the way just yet. You need to make sure the toilet is sitting level and straight. Use shims if you need to fill any small gaps under the base. Once it looks good, tighten those nuts down, but do it gradually, alternating between them. You don't want to crack the porcelain. A little snug is good; too tight is bad.
Attaching the Tank and Water Supply Line
Now for the tank. Most tanks come with the bolts already installed. You’ll place the tank onto the bowl, making sure the rubber gasket lines up with the opening. Then, from underneath, you’ll add washers and nuts to secure the tank to the bowl. Again, tighten these evenly. Next, connect the water supply line. You’ll attach one end to the fill valve on the tank and the other end to the shut-off valve on the wall. Make sure the connections are snug – hand-tight plus a quarter turn with a wrench usually does the trick. Over-tightening can damage the fittings.
Testing for Leaks and Flush Functionality
This is the moment of truth. Turn the water supply back on slowly at the shut-off valve. Let the tank fill up. Keep an eye out for any drips around the supply line connections or where the tank meets the bowl. Once the tank is full, give the flush lever a push. Watch how the water empties from the tank and how the bowl refills. Does it flush completely? Does the tank refill properly? Check again for any leaks, especially around the base of the toilet where it meets the wax ring. If everything looks good, you’ve successfully installed your new toilet! If you notice any leaks, turn off the water and go back to check those connections or the wax ring seal. Sometimes, a slight adjustment is all that's needed. For more on installing faucets, you can check out tips for installing a sink faucet.
Professionals always double-check their work. It’s better to spend a few extra minutes testing and confirming everything is sealed and working correctly than to deal with a water damage claim later. Patience is key in this job.
Fixture Installation Best Practices
When you're putting in new bathroom fixtures, like vanities and faucets, there are a few things that pros always do to make sure everything looks good and works right. It’s not just about getting it in place; it’s about doing it smart.
Installing Faucets Before Vanity Units
This is a big one that many people miss. If you can, get the faucet installed on the vanity before you screw the vanity down to the wall or floor. Trying to reach around a big vanity cabinet to connect water lines and tighten nuts is a real pain. It’s so much easier to do it when you have clear access. You’ll need to be careful not to scratch the new faucet or vanity finish while you’re working, but trust me, it saves a lot of awkward maneuvering later. Just make sure you don't overtighten anything at this stage.
Leveling Vanities for Stability
Nobody wants a wobbly vanity. Always use a carpenter's level to check if the vanity is sitting straight, both front-to-back and side-to-side, before you secure it. If the floor isn't perfectly flat, you might need to use shims to get it level. This step is super important because if the vanity isn't level, the countertop might not sit right, and drawers or doors could stick. It also puts extra stress on the connections if it's not sitting flush.
Securing Countertops with Adhesive or Brackets
Once the vanity is level and secured to the wall, it's time for the countertop. Most manufacturers will tell you the best way to attach it, but generally, you'll use a good quality adhesive or mounting brackets. For stone or solid surface countertops, adhesive is usually the way to go. It creates a strong bond and helps prevent the countertop from shifting. Make sure to use the amount recommended by the manufacturer – too much can squeeze out and make a mess, too little and it might not hold well. If you're using brackets, ensure they're placed correctly to support the countertop without being visible.
Proper installation isn't just about following steps; it's about anticipating how things will work together and last over time. Small details, like leveling or pre-installing certain parts, make a huge difference in the final outcome and prevent future headaches.
Advanced Techniques for Superior Finishes
Getting those finishing touches just right can really make a bathroom remodel shine. It’s not just about slapping things into place; it’s about making sure everything looks good and works well for years to come. This means paying attention to details that might seem small but make a big difference.
Overboarding Surfaces for Tiling
Before you even think about laying tile, you need a solid base. If you’re working with a floor or wall that’s not perfectly flat, or if you’re just looking for extra durability, adding a layer of cement board or plywood over the existing surface is a smart move. This process, called overboarding, gives your tiles a stable foundation. It helps prevent cracking down the road, especially in areas that might get a bit damp. Think of it like putting down a good subfloor before installing hardwood – it’s that important for a lasting finish.
Dry-Fitting Tiles for Precision
This is one of those steps that saves a lot of headaches later. Before you mix any thin-set mortar, lay out your tiles in the space you’re tiling. This is called dry-fitting. It lets you see how the pattern will look, figure out where your cuts will fall, and make sure everything lines up nicely. You can spot potential problems, like awkward cuts at the end of a row or tiles that don’t quite fit, and adjust your layout before committing. It’s a bit like a dress rehearsal for your tile job.
Applying Grout and Sealant for Durability
Once the tiles are set and the mortar is cured, it’s time for grout. Grout fills the gaps between tiles, but it also adds to the overall look. Make sure you mix it to the right consistency – not too wet, not too dry. Work it into the joints with a grout float, making sure there are no air pockets. After the grout has set up a bit, you’ll need to clean off the excess. For areas that see a lot of moisture, like around the tub or shower, applying a bead of silicone sealant is a must. This creates a watertight barrier and prevents mold and mildew from creeping in. A clean bead of caulk really finishes the job nicely, giving it that professional look. You can find good tips on proper grout application at bathroom remodel tips.
Don't rush the drying times between steps. Whether it's mortar, grout, or sealant, giving each product the time it needs to cure properly is key to a durable and leak-free installation. Patience here really pays off.
Lighting Considerations for Enhanced Ambiance
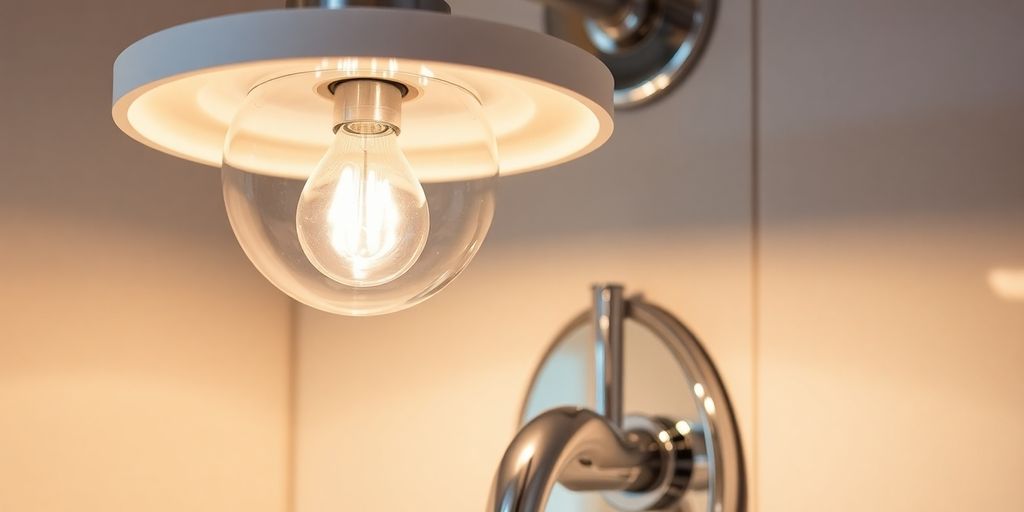
When you're putting in new bathroom fixtures, don't forget about the lighting. It really makes a difference in how the room feels. Think about it, a dimly lit bathroom isn't exactly the most pleasant place to get ready in the morning, right?
Adjusting Wiring for New Fixture Dimensions
Sometimes, the new light fixture you picked out won't fit exactly where the old one was. If the new fixture is bigger or smaller, you might need to adjust the wiring or patch up the ceiling or wall. If you've never messed with electrical wiring before, it's probably best to call in an electrician for this part. Trying to move power outlets or deal with wires when you're not sure what you're doing can be a real headache, and honestly, a bit dangerous. It’s always better to be safe than sorry when it comes to electricity. You can find some great resources on basic wiring adjustments if you're curious, but professional help is often the way to go.
Incorporating Ambient, Task, and Accent Lighting
Most bathrooms just have one overhead light, which is okay, but you can do so much better. A well-lit bathroom usually has a few different types of lighting working together.
- Ambient Lighting: This is the general, overall light in the room. Think of a nice ceiling fixture that gives off a soft glow. It sets the mood.
- Task Lighting: This is super important for areas like the vanity. You want bright, clear light right where you need it for shaving, applying makeup, or brushing your teeth. Sconces on either side of the mirror are great for this.
- Accent Lighting: This is for highlighting specific features, like artwork or a cool tile detail. It adds a bit of flair and personality.
Layering these different types of light makes the bathroom more functional and also more inviting. It’s like painting with light, really.
When to Hire an Electrician for Lighting Upgrades
So, when should you actually call in the pros for your lighting? If you're just swapping out an old fixture for a new one that fits in the same spot and uses the same wiring, you might be able to handle it yourself. But if you need to:
- Move a light fixture to a different location.
- Add new outlets or switches.
- Install lighting in an area that didn't have it before (like a shower niche).
- You're unsure about the existing wiring or the fixture's requirements.
...then it's definitely time to call an electrician. They have the tools and the know-how to make sure everything is wired correctly and safely. It’s a small price to pay for peace of mind and a properly functioning lighting system.
Troubleshooting Common Installation Challenges
Even with the best planning, sometimes things don't go perfectly when installing bathroom fixtures. Don't sweat it; most issues have straightforward fixes. Knowing what to look for and how to tackle common problems can save you a lot of hassle and keep your project moving.
Addressing Leaks After Installation
Leaks are probably the most common headache after setting up a new toilet or faucet. Usually, they pop up around the base of the toilet or at the water supply connections. For toilets, the first thing to check is the wax ring seal. If it wasn't seated correctly or the toilet wasn't tightened down evenly, you might get a leak. Also, double-check that the tank-to-bowl bolts are snug and that the water supply line connection to the fill valve is tight. Sometimes, a faulty supply line itself can be the culprit. For faucets, leaks often happen at the supply line connections or from the spout base. Making sure all connections are firm, but not overtightened, is key. If a faucet is still dripping after you've checked everything, the internal cartridges might be faulty, and replacing them is usually the next step. Dealing with leaky fixtures can be frustrating, but a systematic check usually points to the cause. For more on fixing common faucet issues, you might find it helpful to look at common faucet and shower problems.
Resolving Toilet Instability Issues
If your newly installed toilet wobbles or feels loose, it's usually down to how it's secured to the floor. The main culprits are often the closet bolts that go through the flange and into the toilet base. Make sure these bolts are properly tightened, but be careful not to overtighten, which can crack the porcelain. If the floor flange itself is damaged or not sitting flush with the floor, that can also cause instability. Sometimes, the flange might be too low, and you'll need to build it up with flange extenders or shims to get a solid connection. Using the right kind of shims under the toilet base can also help level it out and stop any rocking.
When to Consult a Professional Plumber
While many installation hiccups are DIY-fixable, there are times when calling in a pro is the smartest move. If you've tried the usual fixes for leaks and they persist, or if the toilet is seriously unstable and you can't figure out why, it might be time to get expert help. Unexpected issues with your home's main water lines, or if you encounter a severely damaged floor flange that needs extensive repair or replacement, are also good reasons to call a plumber. Sometimes, it's just about knowing your limits and recognizing when a problem is beyond your current skill set or available tools. Don't hesitate to reach out if you're feeling overwhelmed or if the problem seems to be getting worse.
Wrapping Up Your Fixture Project
So, you've gone through the steps, gathered your tools, and hopefully, your new bathroom fixtures are looking great. Remember, taking your time and following instructions is key, whether you're swapping out a faucet or tackling a whole new vanity. Don't be afraid to call in a pro if things get tricky, especially with electrical or complex pipe work. Keeping up with regular cleaning and checking for small leaks will help your new fixtures last for years. It’s all about making your bathroom work well and look good, and now you've got a better handle on how to do just that.
Frequently Asked Questions
What tools do I need to install a toilet?
To install a toilet, you'll need basic tools like an adjustable wrench and a screwdriver. A new toilet kit is also important, which usually comes with a wax ring, bolts, and a water supply line. Make sure you have these handy before you start.
Can I install a toilet myself?
Yes, you can install a toilet yourself! It's a great way to save money and learn a new skill. Just be sure to read the instructions carefully and take your time. If you're not comfortable, it's always okay to call a pro.
What should I do if my toilet leaks after installation?
If you see water leaking after installing a toilet, first check if the bolts are tight and the water line is connected securely. Also, make sure the wax ring is sealing properly. If the leak continues, it's a good idea to get help from a professional plumber.
How can I make my toilet installation eco-friendly?
To make your toilet more eco-friendly, choose a low-flow model that uses less water with each flush. Also, fixing any leaks quickly helps save water. It's all about using water wisely!
When is it best to call a professional plumber?
You should call a professional plumber if you run into big problems, like leaks that won't stop or if the toilet feels wobbly. They have special tools and know-how to fix tricky issues and prevent more damage.
What are the basic steps for installing a toilet?
The main steps involve turning off the water, removing the old toilet, putting a new wax ring on the pipe, placing the new toilet, connecting the tank, and then hooking up the water supply. After that, you turn the water back on and check for leaks.

