

How to Replace a Shower Head – No Plumber Needed: A DIY Guide
Ever thought about sprucing up your bathroom but felt a bit lost when it came to the plumbing stuff? Well, changing out a shower head might seem like a big job, but honestly, it's pretty simple. You don't need to call in a pro or spend a bunch of money. This guide will walk you through everything, step by step, so you can easily handle it yourself. Let's get your shower looking and feeling great without any fuss.
Key Takeaways
- Gather your tools and materials first, including your new shower head, basic tools, and cleaning supplies.
- Always turn off the water supply before starting work to avoid any unexpected floods.
- When removing the old shower head, be gentle, especially if it's been there a while and might be stuck.
- Clean the shower arm threads well and apply plumber's tape correctly for a good, tight seal.
- After installing the new shower head, check for leaks by turning the water on slowly and watching for drips.
Gathering Your Essential Tools and Materials
Before you even think about twisting off that old shower head, let's make sure you've got everything you need. Trust me, nothing's worse than getting halfway through a project and realizing you're missing a key tool. It's like trying to bake a cake and realizing you're out of eggs – total buzzkill.
Selecting Your New Shower Head
First things first, you gotta pick out your new shower head! This is the fun part. Do you want a rainfall shower head, a handheld one, or something with multiple settings? There are tons of options out there, so take your time and find one that fits your style and budget. Consider things like water pressure and spray patterns. I personally love the multi-spray pattern varieties because you can change it up depending on your mood.
Must-Have Tools for the Job
Okay, now for the not-so-fun part: gathering the tools. But hey, it's gotta be done! Here's a list of what you'll likely need:
- Adjustable wrench: This is key for loosening and tightening the connections. Get one with smooth jaws if you can, so you don't scratch up your new shower head.
- Plumber's tape (aka Teflon tape): This stuff is your best friend when it comes to preventing leaks. Wrap it around the threads of the shower arm before attaching the new shower head.
- Pliers: Sometimes, that old shower head is really stuck on there. Pliers can give you some extra grip, but be careful not to damage the finish.
- Screwdriver: You might need this to remove any old screws or to help pry off stubborn parts.
- A bucket or container: To catch any water that might drip out when you remove the old shower head.
I always keep a small toolbox with these essentials handy. You never know when you might need to fix a leaky faucet or tighten a loose screw. It's a good investment for any homeowner.
Protective Gear and Cleaning Supplies
Before you start wrenching away, protect yourself and your shower area. Here's what I recommend:
- Old towel or drop cloth: Lay this down in the shower to protect the floor from scratches and dents if you drop a tool.
- Cleaning supplies: You'll want to clean the shower arm after removing the old shower head. A simple cleaning solution and a scrub brush will do the trick.
- Gloves: These will protect your hands from dirt, grime, and any harsh cleaning chemicals.
- Eye protection: Just in case any debris or water sprays in your face, it's always a good idea to wear safety glasses or goggles.
Preparing Your Shower Area for Replacement
Before you even think about touching that old shower head, it's super important to get your shower area prepped. Trust me, a little prep work now can save you a ton of headaches later. It's all about making the process smooth and preventing any damage.
Turning Off the Water Supply
This is the absolute first thing you need to do. Seriously, don't skip this step unless you want a surprise geyser in your bathroom. Usually, there are shut-off valves located near the shower or the main water supply for your house. If you can find the shower valve, great! If not, you might have to shut off the main water supply. Make sure everyone in the house knows before you do this – nobody likes a cold shower surprise!
Protecting Your Shower Surfaces
Showers and tubs can scratch easily, so lay down an old towel or blanket in the shower area. This will protect the base from any tools you might drop. It's also a good idea to cover the drain. You don't want any small parts falling down there – trust me, fishing them out is no fun. I usually use a small rag or even a piece of paper towel to plug it up.
Ensuring a Safe Workspace
Safety first, always! Make sure you have enough light to see what you're doing. If your bathroom lighting isn't great, grab a work light or a bright lamp. Also, clear away any clutter around the shower area. You don't want to be tripping over shampoo bottles or shower caddies while you're trying to work. A clear space is a safe space. If you're using a ladder or step stool, make sure it's stable and on a level surface. You might need to install a direct-to-stud shower enclosure if you're doing a full remodel, but for a simple shower head swap, just make sure you're not going to fall!
Removing Your Old Shower Head
Loosening the Existing Fixture
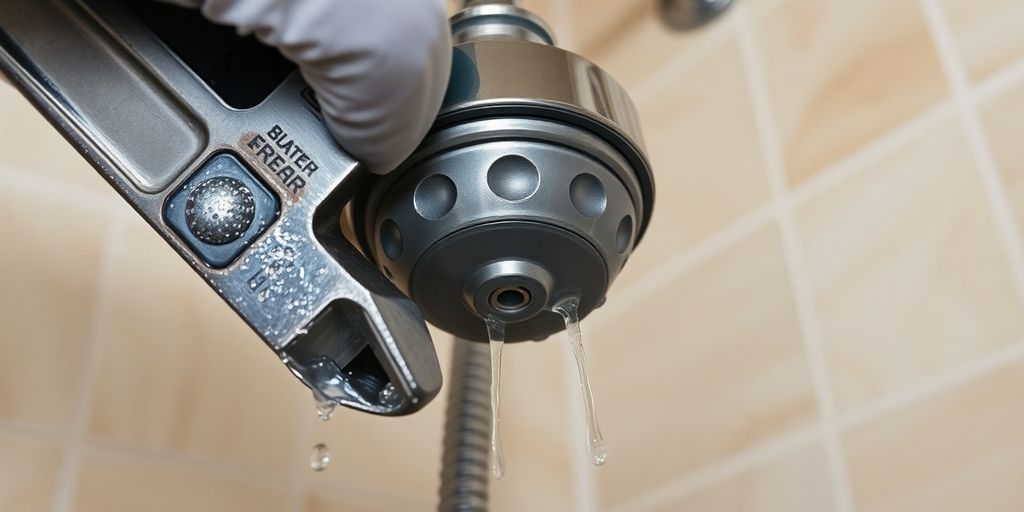
Okay, time to get that old shower head off! Most of the time, you can actually just unscrew it by hand. Give it a try – turn it counterclockwise. If it budges, great! Keep going until it's completely off. If it's on there super tight, don't force it too much. You might need a wrench. Remember to protect the finish with a cloth to avoid scratches. This is a crucial step, so take your time.
Dealing with Stubborn Shower Heads
Sometimes, those shower heads just don't want to come off. If it's really stuck, grab your adjustable wrench or slip-joint pliers. Wrap the jaws with electrical tape or a cloth to protect the shower arm's finish. Grip the base of the shower head with the wrench and gently try to loosen it. Apply steady pressure and turn counterclockwise. If it's still not moving, try a little back-and-forth motion to break the seal. Be patient; you don't want to damage the shower arm.
Handling Mineral Buildup and Corrosion
Mineral buildup is a common reason why shower heads get stuck. If you see white, chalky deposits (that's usually calcium), try spraying some vinegar or a limescale remover around the connection point. Let it sit for a bit to dissolve the minerals. You can also try gently tapping around the base of the shower head with a rubber mallet to help loosen things up. Here's a quick rundown of what you might encounter:
- Calcium: White, chalky deposits.
- Rust: Reddish-brown discoloration.
- Corrosion: General degradation of the metal.
If you're dealing with significant corrosion, be extra careful not to damage the shower arm itself. Sometimes, it's better to call a plumber than risk breaking the pipe inside the wall. It's all about knowing when to throw in the towel.
Once you get the old shower head off, make sure to clean the threads on the shower arm really well. You want a nice, clean surface for the new one to seal properly. This will help prevent leaks later on.
Cleaning and Preparing the Shower Arm
Thoroughly Cleaning the Threads
Okay, you've wrestled off the old shower head – good job! Now, don't just slap on the new one. The next super important thing is to get the shower arm threads nice and clean. This makes sure you get a good, tight seal, which means no annoying drips later. First, take a good look at the threads. Are there chunks of old tape, weird mineral deposits, or even rust? All that stuff needs to go.
Removing Old Sealant and Debris
Getting rid of the old sealant and any other gunk is key. You can usually peel off the old Teflon tape with your fingers. If it's being stubborn, try using a small, pointed tool – just be careful not to scratch the metal. For mineral buildup, white vinegar is your friend. Soak a cloth in vinegar and wrap it around the threads for about an hour. Then, scrub it with an old toothbrush. It should come right off. Make sure you get every last bit of old tape and debris off the threads. A clean surface is a happy surface, and it will make the new tape stick much better.
Inspecting for Damage or Wear
Before you move on, give the shower arm a good once-over. Look for any cracks, dents, or serious corrosion. If the shower arm is damaged, putting a new shower head on it is like putting a band-aid on a broken leg. You'll probably need to replace the whole shower arm, which is a slightly bigger job, but it's better than dealing with leaks and potential water damage down the road.
If you find any significant damage, it's best to consult a professional plumber. They can assess the situation and recommend the best course of action. Ignoring damage can lead to bigger problems later on, like leaks inside the wall, which are a pain to fix.
Here's a quick checklist:
- Check for cracks
- Check for corrosion
- Check for dents
Applying Plumber's Tape for a Secure Seal
Understanding the Importance of Thread Tape
Thread tape, often called plumber's tape or Teflon tape, is your best friend when it comes to preventing leaks. It creates a watertight seal by filling the tiny gaps between the threads of the shower arm and the shower head. Without it, you're almost guaranteed to have drips and wasted water. It's a small investment that saves a lot of hassle. Think of it as cheap insurance against a constantly dripping shower head. You can find thread seal tape at any hardware store.
Proper Application Techniques
Applying plumber's tape isn't rocket science, but there's a right way and a wrong way to do it. Here's the breakdown:
- Make sure the threads on the shower arm are clean and dry. Any dirt or old sealant can interfere with the tape's ability to create a good seal.
- Hold the tape so that as you wrap it around the threads, it goes on in a clockwise direction. This ensures that when you screw on the shower head, it tightens the tape rather than unraveling it.
- Overlap each wrap slightly, and apply the tape with a bit of tension. This helps it conform to the threads and create a tighter seal. Two or three wraps are usually enough; avoid overdoing it, as too much tape can actually make it harder to tighten the connection properly.
Applying plumber's tape correctly is all about creating a tight, secure seal. The goal is to fill any gaps between the threads, preventing water from escaping. Take your time, and make sure the tape is applied smoothly and evenly.
Ensuring a Watertight Connection
The key to a watertight connection is proper preparation and careful tightening. After applying the plumber's tape, gently screw the shower head onto the shower arm by hand. Once it's snug, use a wrench to tighten it a bit further, but be careful not to overtighten. Overtightening can damage the threads or even crack the shower head, especially if it's made of plastic. If you're still getting drips after tightening, try loosening the connection, adding another wrap of plumber's tape, and retightening. Sometimes, it takes a little trial and error to get it just right.
Installing Your New Shower Head
Alright, you've made it this far! Now comes the satisfying part: putting in that shiny new shower head. It's usually pretty simple, but paying attention to the details will save you from drips later. Let's get to it.
Attaching the Replacement Fixture
First things first, grab your new shower head. Make sure you know what kind you have, as the attachment method can vary slightly. Start by carefully screwing the shower head onto the shower arm by hand. This helps prevent cross-threading, which can damage the connection. Turn it clockwise, and don't force it. You should feel it catching the threads smoothly. If your new shower head came with a rubber washer or gasket, make sure it's properly seated inside the shower head's connector before you start screwing it on. This washer is what creates the initial seal, so don't skip it!
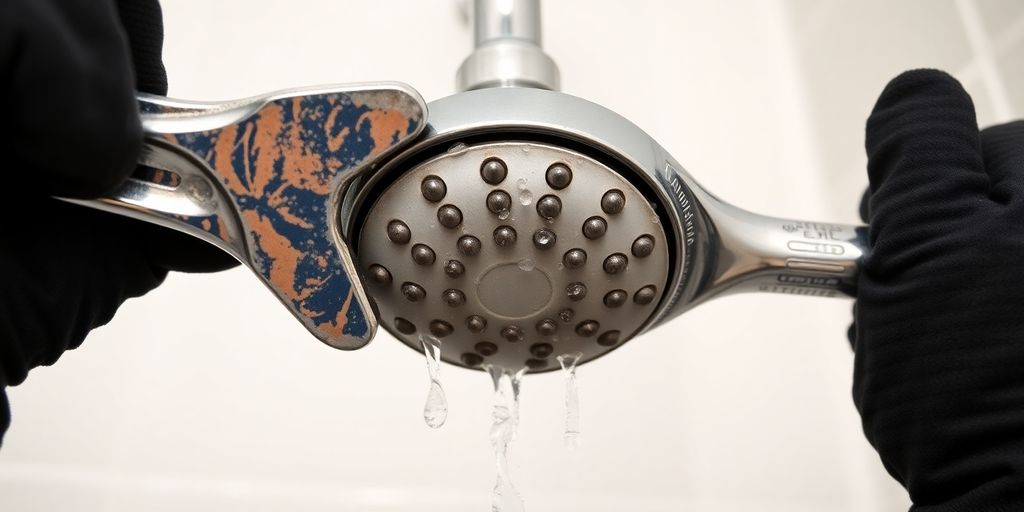
Tightening for a Snug Fit
Once you've hand-tightened the shower head as much as you can, it's time to use a wrench for that final snug fit. But be careful! Over-tightening is a common mistake that can crack the shower head or even damage the shower arm. Use an adjustable wrench, and wrap the jaws with a cloth to protect the finish of your new fixture. Gently tighten the shower head, turning it just a bit more until it feels secure. You're aiming for a firm connection, not a super-human grip. Remember, a little goes a long way. If it feels too tight, back off a bit and try again. You can always tighten it more later if you notice leaks.
Different Shower Head Installation Types
Shower heads come in all shapes and sizes, and some require slightly different installation techniques. Here's a quick rundown:
- Fixed Shower Heads: These are the most common type and usually screw directly onto the shower arm. The steps above apply directly to these.
- Handheld Shower Heads: These often come with a hose and a mounting bracket. You'll need to attach the bracket to the wall (usually with screws) and then connect the hose to both the shower arm and the shower head. Make sure all connections are tight and that the hose isn't kinked.
- Rainfall Shower Heads: These can be mounted directly to the shower arm or suspended from the ceiling. Ceiling-mounted ones often require more extensive plumbing work, but the ones that attach to the shower arm are installed similarly to fixed shower heads. If you're looking to upgrade your bathroom experience today, consider the rainfall type.
Remember to always refer to the manufacturer's instructions for your specific shower head model. They may have unique recommendations or requirements for installation. Following those instructions will help ensure a successful and leak-free installation.
Testing Your New Shower Head for Leaks
Alright, you've wrestled with the old shower head, prepped the arm, and installed the new one. Now for the moment of truth: leak testing! This is where you find out if all that effort paid off. Don't skip this step; a small drip now can turn into a big headache (and a bigger water bill) later.
Turning the Water Supply Back On
Slowly turn the water supply back on. Don't just crank it open full blast right away. Give the pipes a chance to adjust to the pressure. Listen for any strange noises – gurgling, banging, or hissing could indicate air in the lines or a potential problem. Once the water is fully on, take a deep breath and move on to the next step.
Checking for Drips and Sprays
This is where you become a shower head detective. Carefully inspect the connection point between the shower head and the shower arm. Look for any signs of water escaping. Run your finger around the joint; even a tiny bit of moisture means you've got a leak. Also, check the spray pattern of the shower head itself. Are all the nozzles working properly, or are some spraying sideways or not at all?
Troubleshooting Minor Leaks
Okay, so you found a leak. Don't panic! Most of the time, it's an easy fix. First, try gently tightening the connection a little more. A quarter turn might be all it takes. If that doesn't do the trick, turn the water off again, remove the shower head, and add another layer or two of thread tape. Make sure you wrap it in the correct direction (clockwise when looking at the shower arm). Reinstall the shower head and test again. If you're still having problems, it might be time to call in a professional.
Remember, patience is key. Don't overtighten the connection, as this can damage the threads on the shower arm or the shower head itself. A slow and steady approach will usually get the job done right.
Wrapping It Up
So there you have it! Changing out a shower head might seem like a big deal at first, but it's really not. You just need a few basic tools and a little bit of patience. Following these steps means you can get a fresh, new shower experience without having to call in a pro. It's a pretty satisfying feeling to do something like this yourself, and your bathroom will thank you for it. Go ahead and give it a try!
Frequently Asked Questions
Do I really need a plumber to change a shower head?
For most simple shower head swaps, you won't need a professional plumber. This guide is made for regular folks to do it themselves. But if you have a big leak or other serious water problems, it's a good idea to call a pro.
What tools and materials do I need to replace my shower head?
You'll want a new shower head, some plumber's tape (also called Teflon tape), a soft cloth or pliers that won't scratch, an old toothbrush or wire brush, and an adjustable wrench. A small step stool might help too if your shower arm is high up.
How do I remove the old shower head if it's stuck?
First, make sure the water to your shower is turned off. Then, usually, you can twist off the old shower head by hand. If it's stuck, use an adjustable wrench, turning it counter-clockwise. Wrap a cloth around it first to protect the finish.
Why is plumber's tape so important?
Plumber's tape, also known as Teflon tape or thread seal tape, is super important! It helps create a tight seal on the threads of your shower arm, stopping leaks. Without it, water can drip out, even if the connection feels tight.
What should I do to the shower arm before putting on the new shower head?
After taking off the old shower head, you'll want to clean the threads on the pipe coming out of the wall. Use an old toothbrush or a wire brush to scrub away any old gunk, mineral buildup, or rust. This makes sure your new shower head gets a clean, tight fit.
How do I check for leaks after installing the new shower head?
Once your new shower head is on, slowly turn the water back on. Watch closely for any drips or sprays around the connection. If you see leaks, turn the water off, take the shower head off, add more plumber's tape, and tighten it again. Sometimes, it just needs a little more snugness.
Leave a comment